Limited Time Offer!
For Less Than the Cost of a Starbucks Coffee, Access All DevOpsSchool Videos on YouTube Unlimitedly.
Master DevOps, SRE, DevSecOps Skills!
Docker is a powerful platform that uses containerization to simplify application development, deployment, and management. This guide provides a comprehensive breakdown of Docker’s architecture, its core components, workflows, and practical usage examples.
1. Introduction to Docker
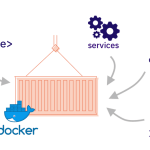
Docker is a client-server platform that allows developers to build, share, and run applications within containers. These containers are lightweight, portable, and ensure consistency across different environments. Docker abstracts away the infrastructure, enabling a smoother and more efficient DevOps workflow.
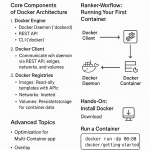
2. Core Components of Docker Architecture
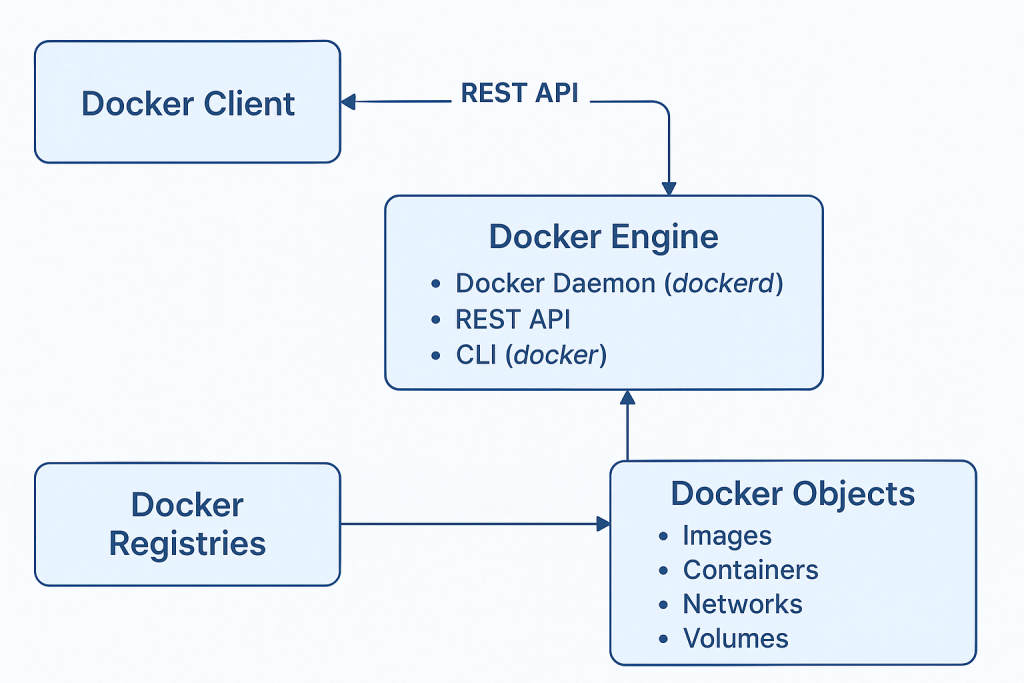
Docker Engine
Docker Engine is the core technology behind Docker. It includes:
- Docker Daemon (
dockerd): The background service managing containers, images, volumes, and networks. It handles Docker API requests and performs container operations. - REST API: Exposes Docker’s features for remote or local communication.
- Command Line Interface (CLI): The main user-facing tool to interact with Docker.
Docker Client
- The Docker client is what users interact with by running commands like
docker run. - It communicates with the Docker daemon via REST API, whether locally or on a remote server.
Docker Registries
- Docker registries store Docker images.
- Common registries: Docker Hub, GitHub Container Registry, private registries.
- Commands:
docker pull <image>to download imagesdocker push <image>to upload images
Docker Objects
- Images: Immutable templates used to create containers.
- Containers: Executable instances of images.
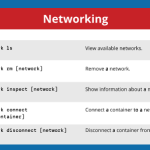
- Networks: Enable communication between containers.
- Volumes: Persist data generated and used by containers.
3. Docker Workflow: Client-Server Interaction
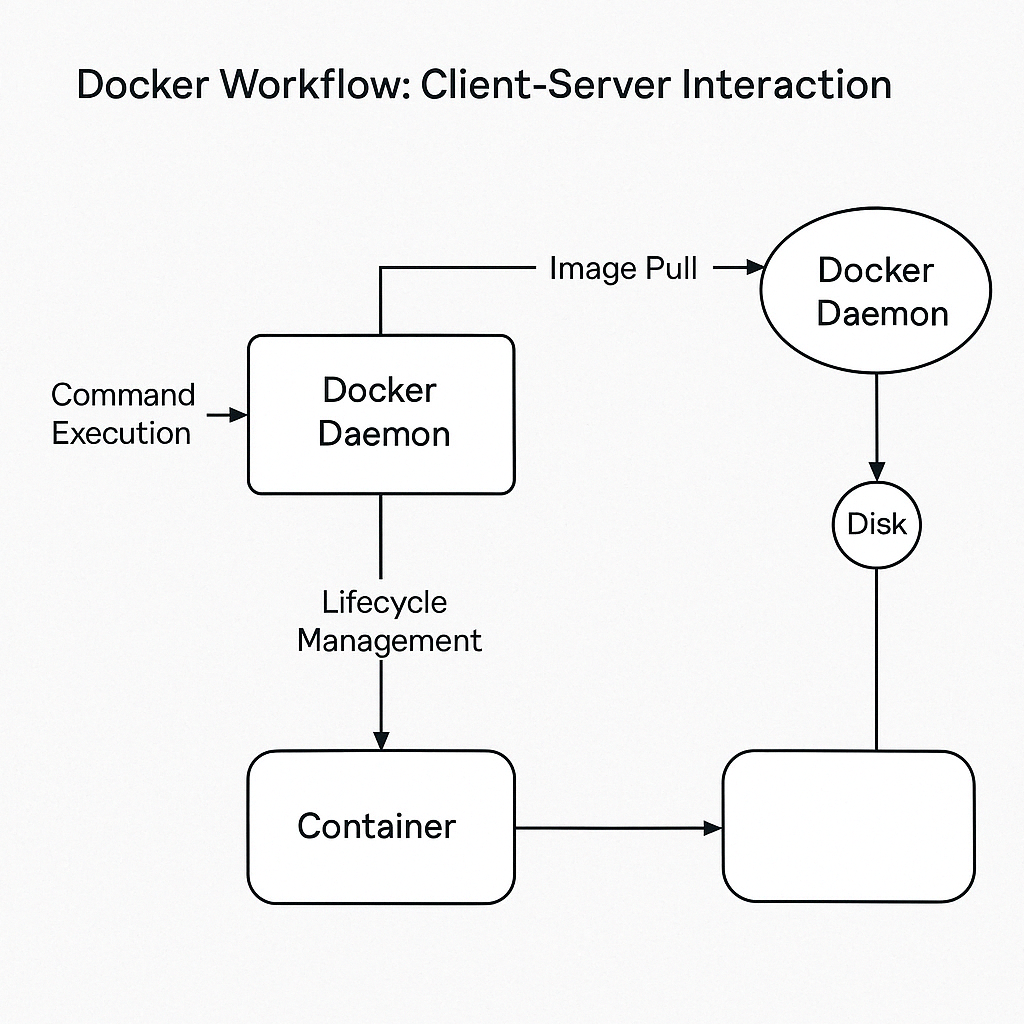
Here is how Docker works step-by-step:
Step 1: Command Execution
docker run nginx
- The CLI sends this command to the Docker daemon.
- Daemon checks if the image exists locally; if not, it pulls from Docker Hub.
Step 2: Container Creation
- Docker creates a container layer from the image.
- Assigns a virtual IP and hostname.
- Starts the container, mapping required ports (e.g.,
-p 80:80).
Step 3: Container Lifecycle
- Start, stop, remove, inspect containers:
docker start <container_id>
docker stop <container_id>
docker rm <container_id>
docker logs <container_id>
4. Hands-On: Running Your First Container
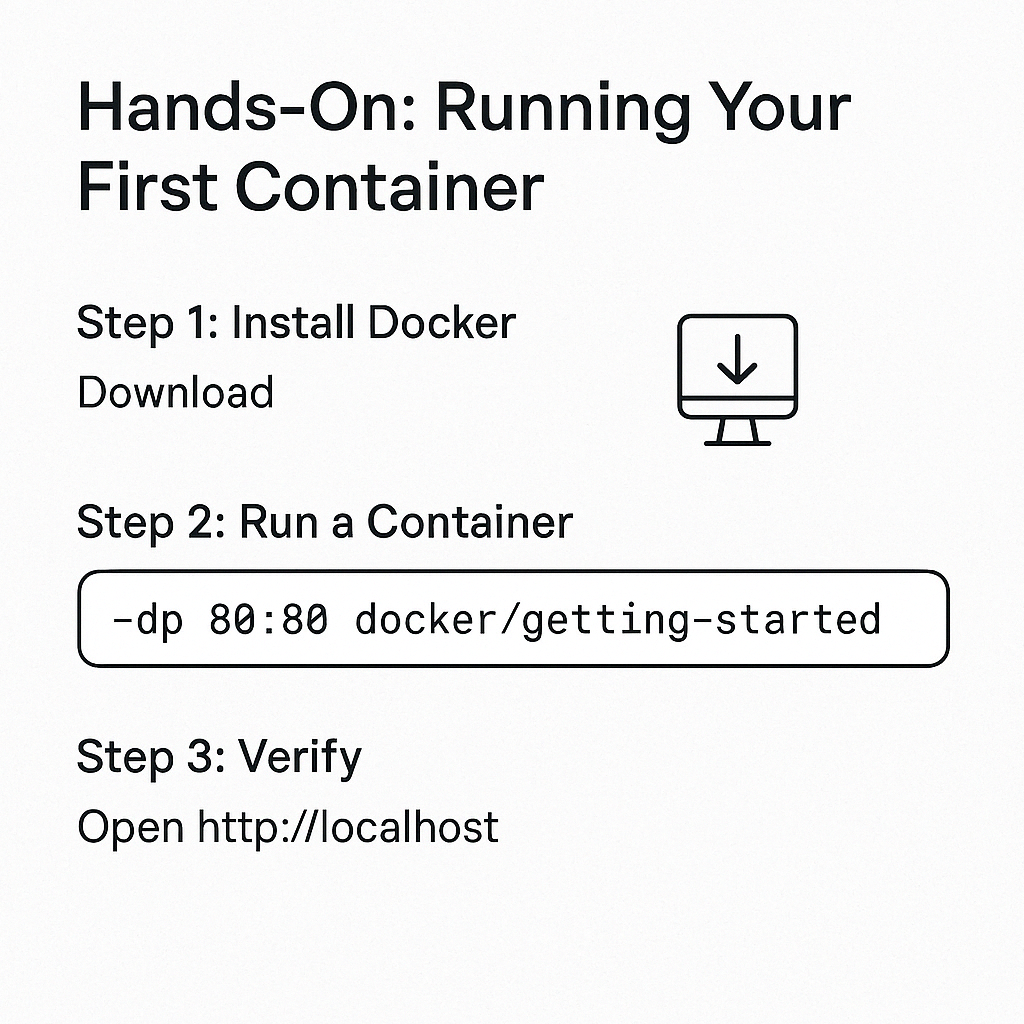
Step 1: Install Docker
Step 2: Run a Demo Container
docker run -dp 8080:80 docker/getting-started
-d: Detached mode (runs in background)-p: Maps host port 80 to container port 80
Step 3: Verify
- Visit
http://localhostto see the running application.
5. Best Practices
- Keep Images Small: Use minimal base images like
alpine. - Multi-Stage Builds: To reduce final image size.
- Run as Non-Root: For enhanced security.
- Use
.dockerignore: Avoid unnecessary files in builds. - Scan Images: Use
docker scanor other tools. - Automate Testing and Deployment: Integrate Docker with CI/CD tools.