Limited Time Offer!
For Less Than the Cost of a Starbucks Coffee, Access All DevOpsSchool Videos on YouTube Unlimitedly.
Master DevOps, SRE, DevSecOps Skills!
Here’s a step-by-step guide to download and run the BlueStacks emulator and install apps from the Google Play Store:
Step 1: Download BlueStacks Emulator
- Visit the Official Website
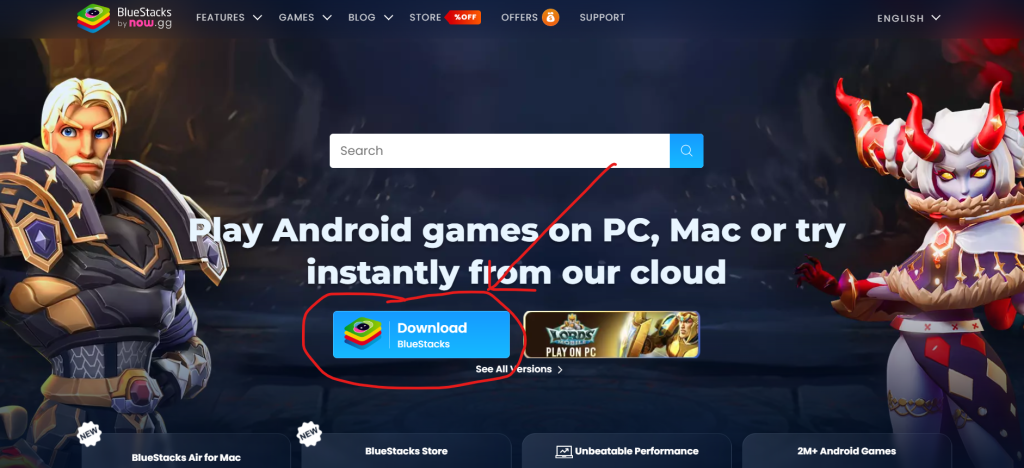
Open your web browser and go to the official BlueStacks website:
https://www.bluestacks.com
- Download BlueStacks
- Click the “Download BlueStacks” button on the homepage.
- Ensure you select the version compatible with your operating system (Windows or macOS).
- Save the File
- Save the downloaded installation file to your desired location on your computer.
Step 2: Install BlueStacks Emulator
- Run the Installer
- Double-click the downloaded installation file to start the setup.
- Follow the Installation Prompts
- Accept the terms and conditions by clicking “Agree” or “Next”.
- Choose the installation directory if prompted. The default location is recommended for most users.
- Complete the Installation
- Wait for the installation process to complete.
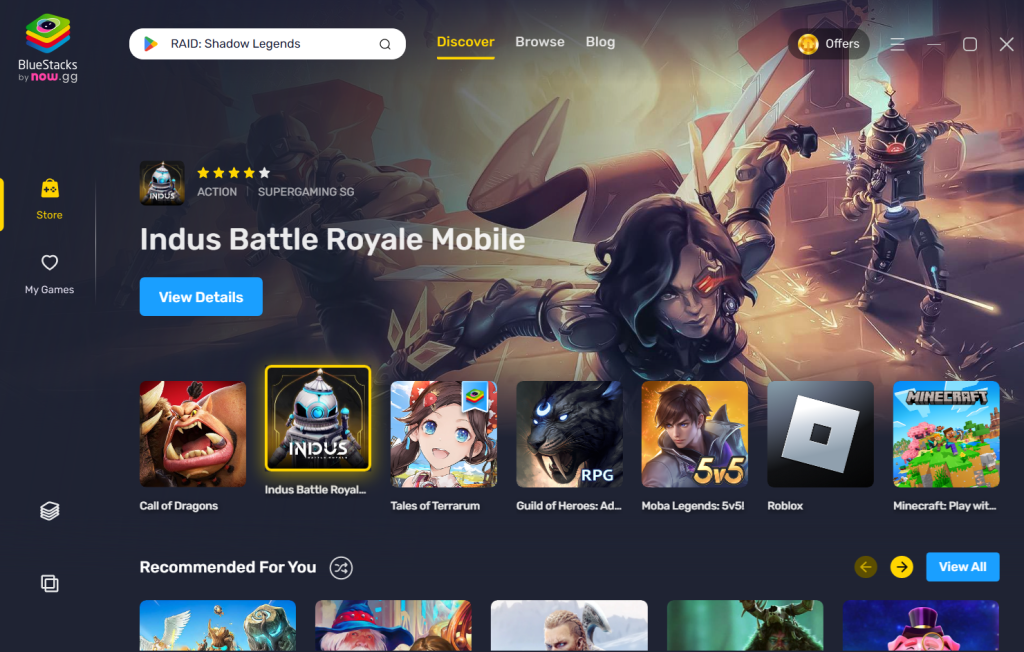
- Click “Finish” once it’s done. BlueStacks will launch automatically after installation.
Step 3: Set Up BlueStacks

- Sign In to Google Account
- When BlueStacks launches for the first time, it will ask you to sign in with your Google account.
- Enter your email and password. If you don’t have a Google account, create one using the “Create Account” option.
- Grant Permissions
- BlueStacks may request permissions like accessing your location or syncing data. Allow these as needed to use all features.
Step 4: Access the Google Play Store
- Open Google Play Store
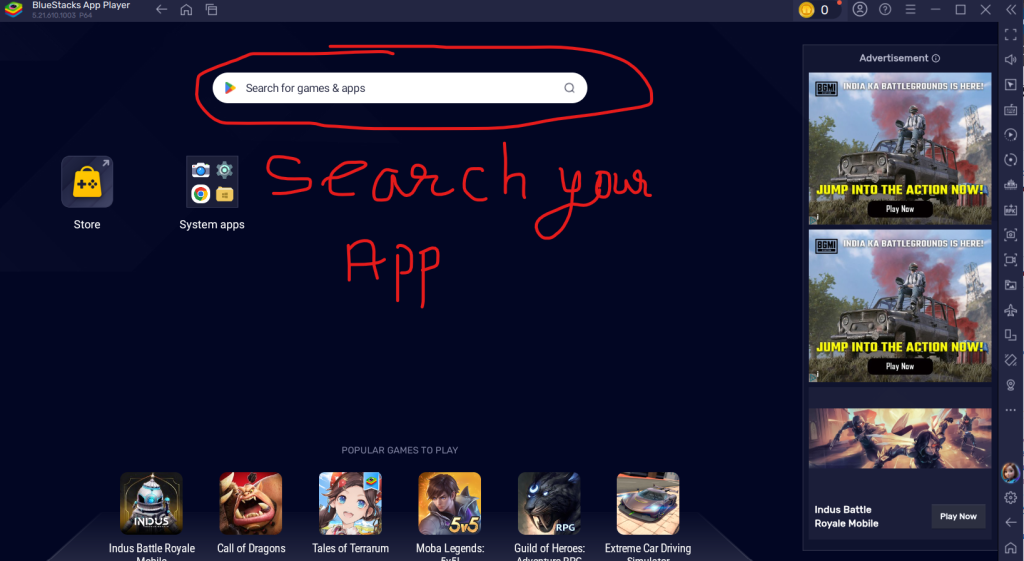
- Locate the Google Play Store app icon on the BlueStacks home screen.
- Click it to open.
- Search for Apps
- Use the search bar at the top to find the app you want to install.
- Example: Type “WhatsApp” or any desired app name and press Enter.
Step 5: Install Apps from Google Play Store
- Select the App
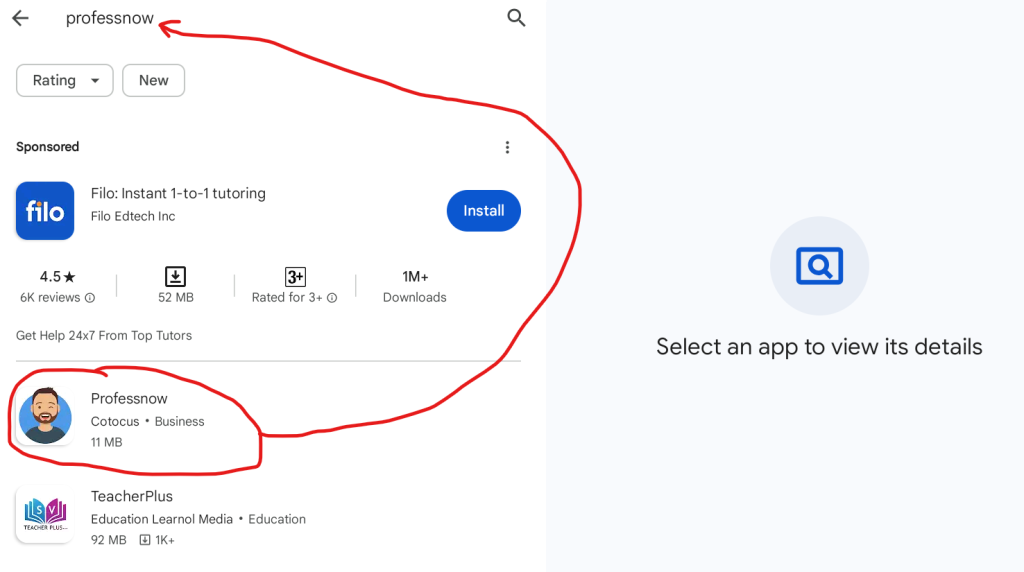
- From the search results, click on the app you want to install.
- Install the App
- Click the “Install” button.
- Wait for the download and installation process to complete.
- Open the App
- After installation, click “Open” or find the app icon on the BlueStacks home screen to launch it.
Step 6: Use Installed Apps
- Launch the App
- Click on the app icon to open it.
- Sign in or follow the setup process for the specific app.
- Enjoy Full Android Experience
- Use the app just like you would on a physical Android device.
Step 7: Additional Tips for Optimizing BlueStacks
- Adjust Performance Settings
- Go to Settings (gear icon in BlueStacks).
- Adjust CPU, RAM allocation, or resolution for smoother performance.
- Enable Virtualization
- For better speed, enable virtualization in your system’s BIOS settings.
- Instructions for this can be found on the BlueStacks support page.
- Sync Files Between PC and Emulator
- Use the Media Manager tool in BlueStacks to transfer files like images and APKs between your PC and the emulator.
For APK File
When you want to run an APK in BlueStacks, follow these straightforward steps:
1. Prepare the APK File
- Download the APK File: Get the APK file of the Android app or game you want to run. Ensure it comes from a trusted source to avoid malware.
2. Open BlueStacks
- Launch BlueStacks: Start the BlueStacks emulator on your computer. If you haven’t installed it yet, download and set it up from www.bluestacks.com.
3. Install the APK
You have two primary options to install the APK in BlueStacks:
Option 1: Drag and Drop
- Locate the APK file on your computer.
- Drag the APK file and drop it into the BlueStacks window.
- BlueStacks will automatically install the APK, and it will appear on the home screen.
Option 2: Use the BlueStacks Install APK Button
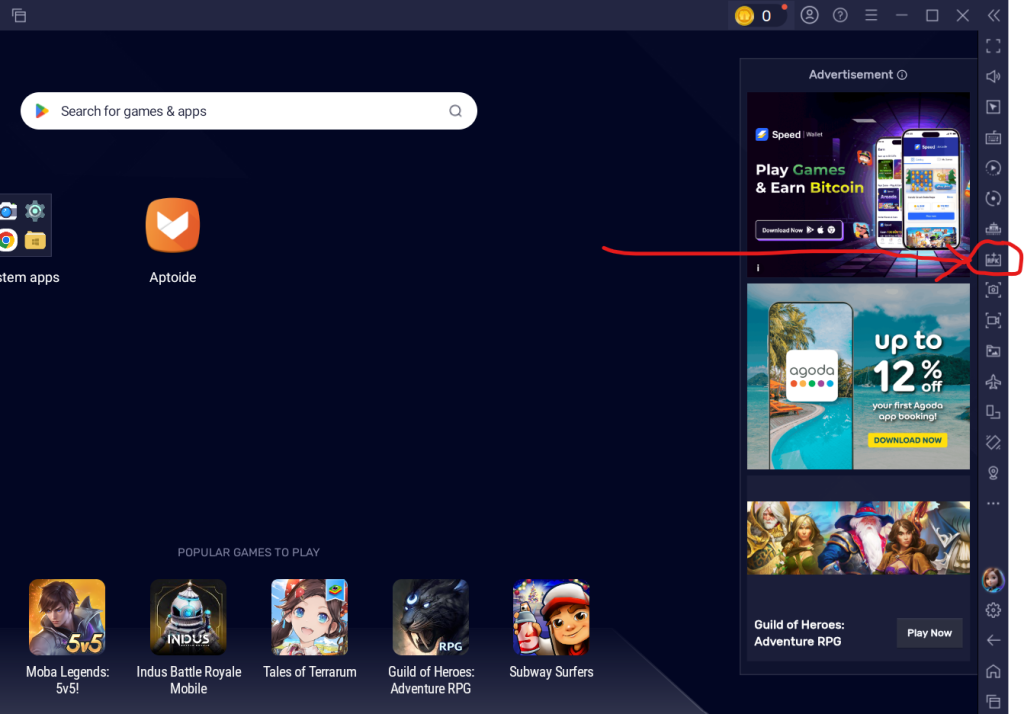
- Locate the APK Install Option:
- In BlueStacks, find and click on the “Install APK” button in the toolbar or from the bottom-right menu.
- Select the APK File:
- Navigate to the location of your APK file and select it.
- Install the APK:
- BlueStacks will install the app, and it will appear on the home screen.
4. Run the Installed App
- Locate the App:
- Once installed, the app will be visible on the BlueStacks home screen or app drawer.
- Click to Open:
- Click the app icon to launch it. It will run in a new tab within BlueStacks.
5. Customize Settings (Optional)
- Set Performance Preferences: If the app requires higher performance, allocate more RAM and CPU to BlueStacks from the settings (gear icon in the top-right corner).
- Adjust Controls: For games, customize controls using the keyboard mapping tool in the sidebar.
6. Troubleshoot Issues (if any)
- APK Fails to Install:
- Ensure the APK file isn’t corrupted and is compatible with BlueStacks.
- App Not Running Smoothly:
- Update BlueStacks to the latest version.
- Close other running programs to free up system resources.
- Graphics Problems:
- Update your PC’s graphics drivers or switch the graphics mode (OpenGL/DirectX) in BlueStacks settings.
By following these steps, you can successfully run APKs in BlueStacks and enjoy your favorite Android apps on your PC or Mac.

