Limited Time Offer!
For Less Than the Cost of a Starbucks Coffee, Access All DevOpsSchool Videos on YouTube Unlimitedly.
Master DevOps, SRE, DevSecOps Skills!

How to Change Your Operating System from Ubuntu to Windows 10
Switching from Ubuntu to Windows 10 can seem like a big step, but with proper guidance, it’s a straightforward process. Whether you’re new to this or have done it before, this guide will walk you through every detail in a simple and humanized way.
Before You Begin
Changing your operating system will completely erase Ubuntu from your computer. So, it’s essential to prepare yourself before jumping into the process. Here’s what you need to do:
- Back Up Your Data:
Take a moment to save your personal files—like photos, documents, or projects. You can copy them to an external hard drive, a USB flash drive, or upload them to cloud storage services like Google Drive or Dropbox. Remember, once the process starts, all existing data on your computer will be erased. - Get a Windows 10 License Key:
Windows 10 isn’t free. Make sure you have a valid license key ready. If you don’t, you can purchase it directly from Microsoft or other trusted retailers. - Create a Windows 10 Bootable USB Drive:
You’ll need another computer with internet access to create the bootable USB drive. If you already have a Windows installation USB, skip this step. Otherwise, follow these steps:- Go to the official Windows 10 Download Page.
- Download the Media Creation Tool provided on the website.
- Use this tool to create a bootable USB drive with the Windows 10 installation files. Make sure your USB drive has at least 8GB of free space.
Step 1: Booting into the Windows 10 Installer
Now that you’re ready, it’s time to start the installation process.
- Insert the Bootable USB Drive:
Plug the USB drive you created into your Ubuntu computer. - Restart Your Computer:
As it restarts, you’ll need to access the BIOS/UEFI settings to make the USB drive the primary boot device. - Access BIOS/UEFI:
- Look out for a message on the screen that says something like “Press [key] to enter setup” or “Boot options.” The key is usually
F2,F12,DEL, orESC—it depends on your computer manufacturer. - Navigate through the BIOS/UEFI menu using the arrow keys.
- Find the Boot Order or Boot Priority settings and move the USB drive to the top of the list.
- Save your changes and exit (usually by pressing
F10).
- Look out for a message on the screen that says something like “Press [key] to enter setup” or “Boot options.” The key is usually
- Boot from USB:
Your computer should now boot directly from the USB drive, launching the Windows 10 installation setup.
Step 2: Installing Windows 10

You’re now in the Windows 10 installer. Follow these steps to install the OS:
- Select Your Preferences:
On the setup screen, choose your language, time zone, and keyboard layout. Once done, click Next. - Start the Installation:
Click on Install Now to begin the process. - Enter Your Product Key:
You’ll be prompted to enter your Windows 10 license key. If you don’t have one, select the option to skip this step—you can activate Windows later. - Choose Installation Type:
When asked how you want to install Windows, select Custom: Install Windows only (advanced). This option lets you install Windows from scratch. - Partition the Drive:
- You’ll see a list of partitions (these represent how your hard drive is currently divided).
- Delete all existing partitions related to Ubuntu to free up space. Caution: Ensure you’ve backed up everything you need because this step is irreversible.
- Once all partitions are deleted, select the unallocated space and click Next. The installer will create a new partition and begin the installation.
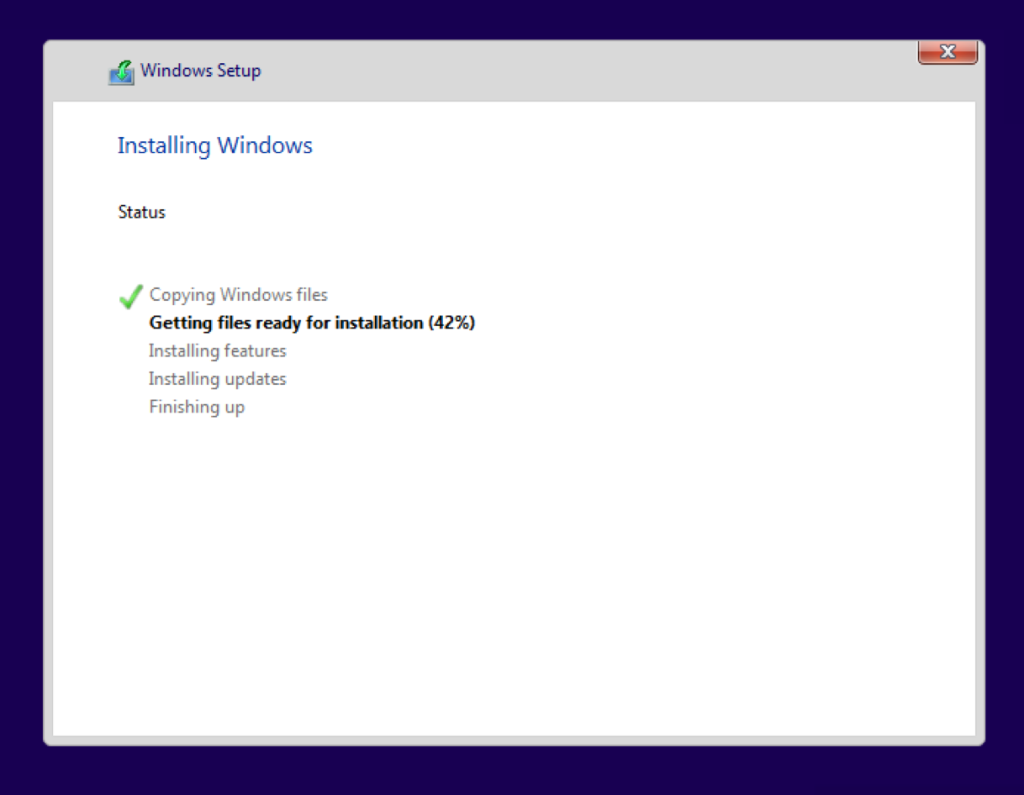
- Wait for the Installation to Complete:
Sit back and relax! The installer will copy files, install features, and configure your system. Your computer may restart several times during the process.
Step 3: Setting Up Windows 10
After installation, your computer will restart and load Windows 10 for the first time. Here’s what to do next:
- Personalize Your Settings:
Follow the on-screen instructions to set up your account, connect to Wi-Fi, and choose your privacy settings. - Install Updates and Drivers:
- Connect to the internet and run Windows Update to download the latest patches and drivers for your hardware.
- If specific devices (like your graphics card or Wi-Fi adapter) aren’t working, visit the manufacturer’s website to download and install the necessary drivers.
- Activate Windows:
- Go to Settings > Update & Security > Activation.
- Enter your product key here if you skipped the activation step earlier.
Step 4: Finishing Touches
- Reinstall Your Apps:
Download and install the applications you need for work or entertainment. - Transfer Back Your Files:
If you backed up your data earlier, now’s the time to restore it. - Explore Your New OS:
Familiarize yourself with Windows 10. Check out features like Cortana, the Microsoft Store, and the Task Manager.
FAQs
- Can I dual-boot Ubuntu and Windows 10?
Yes, but this process is different and requires partitioning your hard drive carefully. If you’d like to dual-boot, let me know! - What happens if I don’t have a Windows 10 product key?
You can install Windows 10 without a product key, but certain features will be limited until you activate it. - Do I need an internet connection to install Windows?
No, but you’ll need one later to download updates and activate Windows.
Switching from Ubuntu to Windows 10 can feel like a big change, but with a little patience, you’ll have a fully functional Windows system in no time. If you get stuck or need help at any step, feel free to ask. Good luck! 🎉

