Limited Time Offer!
For Less Than the Cost of a Starbucks Coffee, Access All DevOpsSchool Videos on YouTube Unlimitedly.
Master DevOps, SRE, DevSecOps Skills!
How to Build an Android APK: A Comprehensive Guide
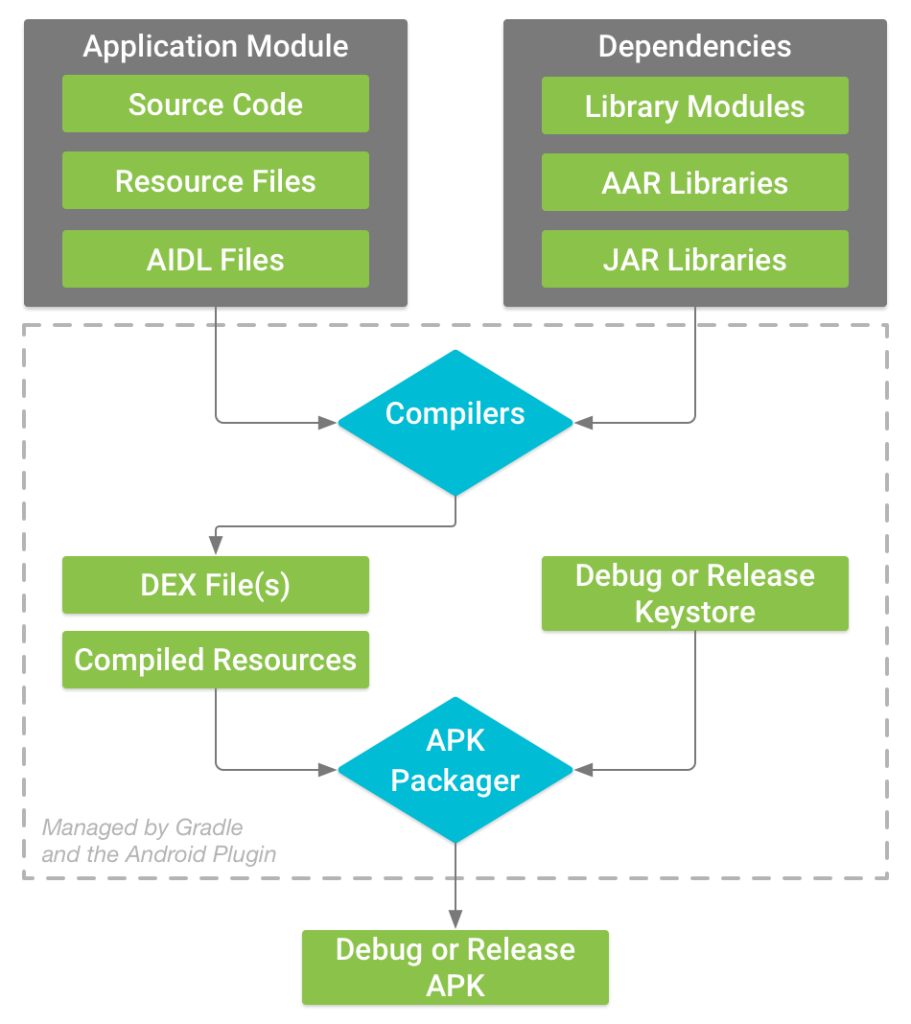
Building an Android APK (Android Package) is an essential step in developing Android applications. An APK file is a packaged file that contains all the necessary elements of your application, such as resources, assets, and code, ready to be installed on Android devices. Here’s a detailed, beginner-friendly guide to help you build your APK:

1. Prerequisites
Before building your APK, make sure you have:
- Android Studio installed (the official IDE for Android development).
- The Java Development Kit (JDK) installed on your computer.
- Your Android project ready for build.
2. Steps to Build the APK

Step 1: Open Your Project
- Launch Android Studio.
- Open your Android project by navigating to
File > Openand selecting the project folder.
Step 2: Configure Build Settings
- In the Project Navigator, open the
build.gradlefiles:- Module-level
build.gradlefile: Ensure the application ID, version code, and version name are correct. - Project-level
build.gradlefile: Confirm the Gradle version and dependencies are properly configured.
- Module-level
Step 3: Set the Build Variant
- In Android Studio, go to
Build > Select Build Variant. - Choose between:
- Debug: For internal testing.
- Release: For distribution on Google Play or external use. (You’ll need to sign your APK for this.)
Step 4: Build the APK
- Navigate to
Build > Build Bundle(s)/APK(s) > Build APK(s). - Wait for the build process to complete. Android Studio compiles your code, processes your resources, and creates the APK.
Step 5: Locate the APK
- Once the build is complete, a notification will appear. Click on
Locateto open the folder containing the APK. - For Debug APK, the file is usually located in:
app/build/outputs/apk/debug/app-debug.apk
3. Building a Signed APK for Release

To distribute your app, you’ll need a signed APK:
Step 1: Generate a Keystore
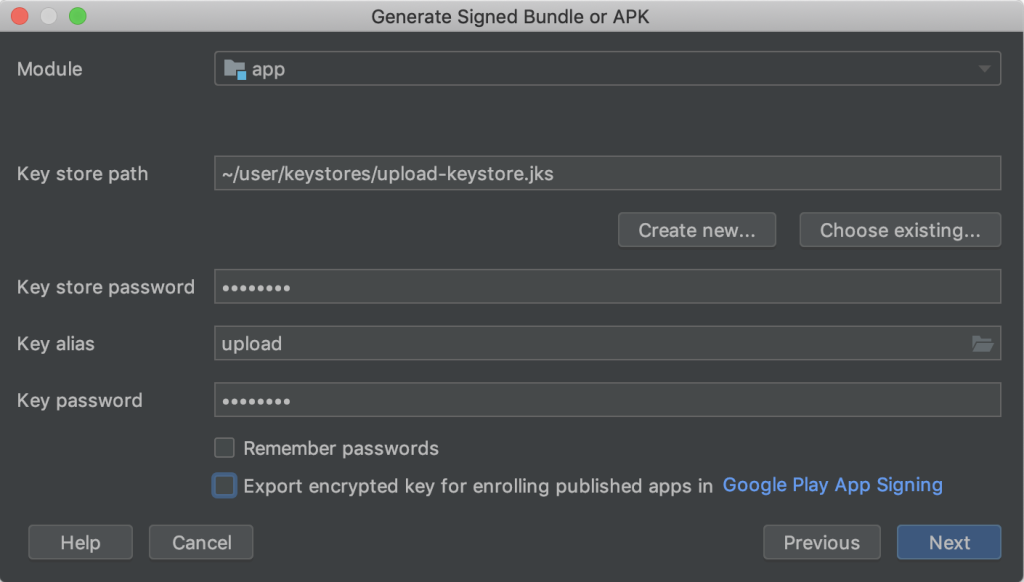
- Go to
Build > Generate Signed Bundle/APK. - Select
APKand clickNext. - Click
Create New...to generate a keystore.- Enter your key details, such as name, password, validity, and organization.
- Save the keystore file securely.
Step 2: Sign the APK
- Use the keystore created in the previous step.
- Select the build type (usually
Release) and clickFinish. - Android Studio will build a signed APK, which is ready for distribution.
Step 3: Locate the Signed APK
- The signed APK can usually be found in:
app/build/outputs/apk/release/app-release.apk
4. Testing Your APK
After building the APK:
- Transfer to a Device: Use USB or upload the APK to a cloud service.
- Install: Enable “Install from Unknown Sources” in your Android device settings and install the APK.
- Test: Run the app on your device to ensure it works as intended.
5. Distributing the APK
- For Internal Use: Share the APK file directly with testers or users.
- For Google Play: Upload the APK to the Google Play Console, ensure it meets all requirements, and publish it.
6. Tips and Best Practices
- Always test your APK thoroughly before distributing it.
- For production, always build a release APK with proper signing.
- Keep your keystore file and passwords safe—they’re essential for future updates.
7. Troubleshooting Common Issues
- Build Errors: Check the Gradle console for detailed error messages.
- APK Size: Use tools like ProGuard to reduce APK size.
- Signing Issues: Ensure your keystore file path and passwords are correct.
By following these steps, you’ll have a fully functional Android APK, ready for testing or distribution. Let me know if you need help with specific configurations or issues during the build process!

Leave a Reply